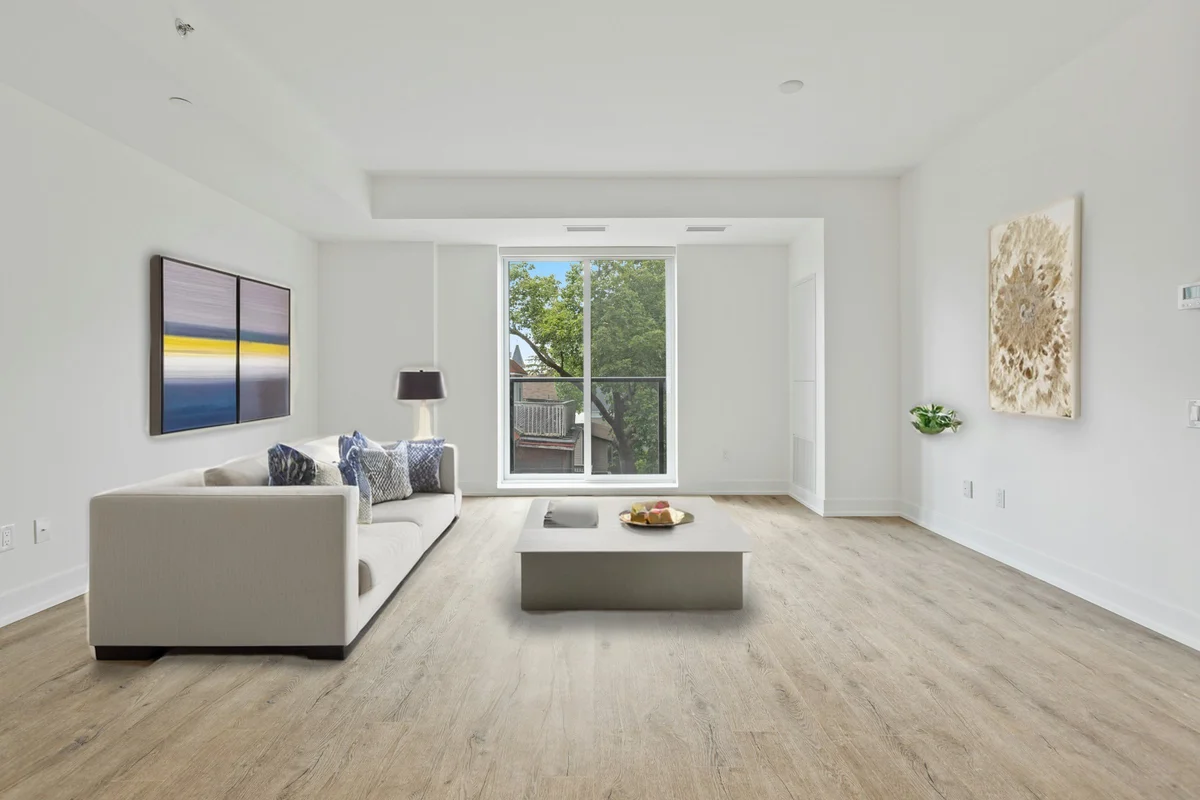
Perspective Correction: Straighten Buildings and Fix Wide-Angle Distortion in 2026
A leaning building isn’t crooked — it’s converging. Learn how AI perspective correction straightens verticals and fixes wide-angle lens bend in seconds.
Munib Ali Laghari
Founder & Lead Developer
Quick answer
How do you straighten a leaning building in a photo?
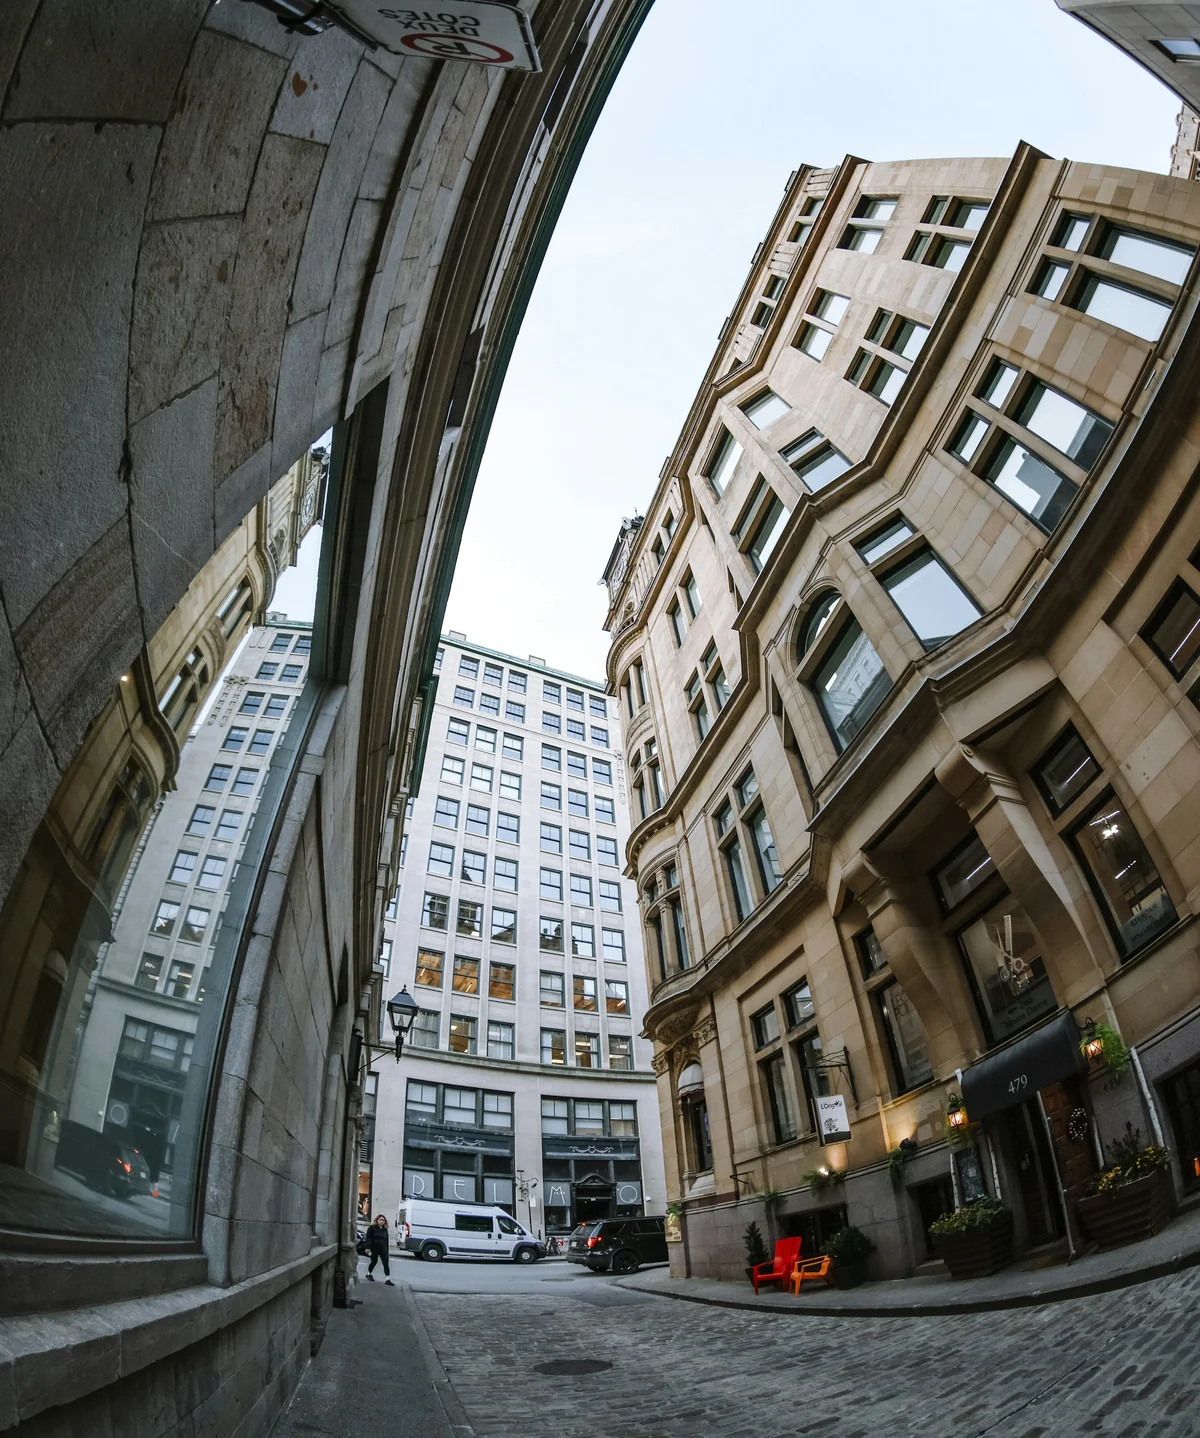
A building leans back because the camera was tilted up, so its parallel verticals converge — rotating can’t fix that. Run it through AI perspective correction: the AI finds the lines that should be vertical, measures how far each leans, and applies a projective warp that pulls them back to parallel while flattening any wide-angle lens bend. EnhanceCraft auto-detects the geometry, with manual sliders for fine-tuning.
Before
After
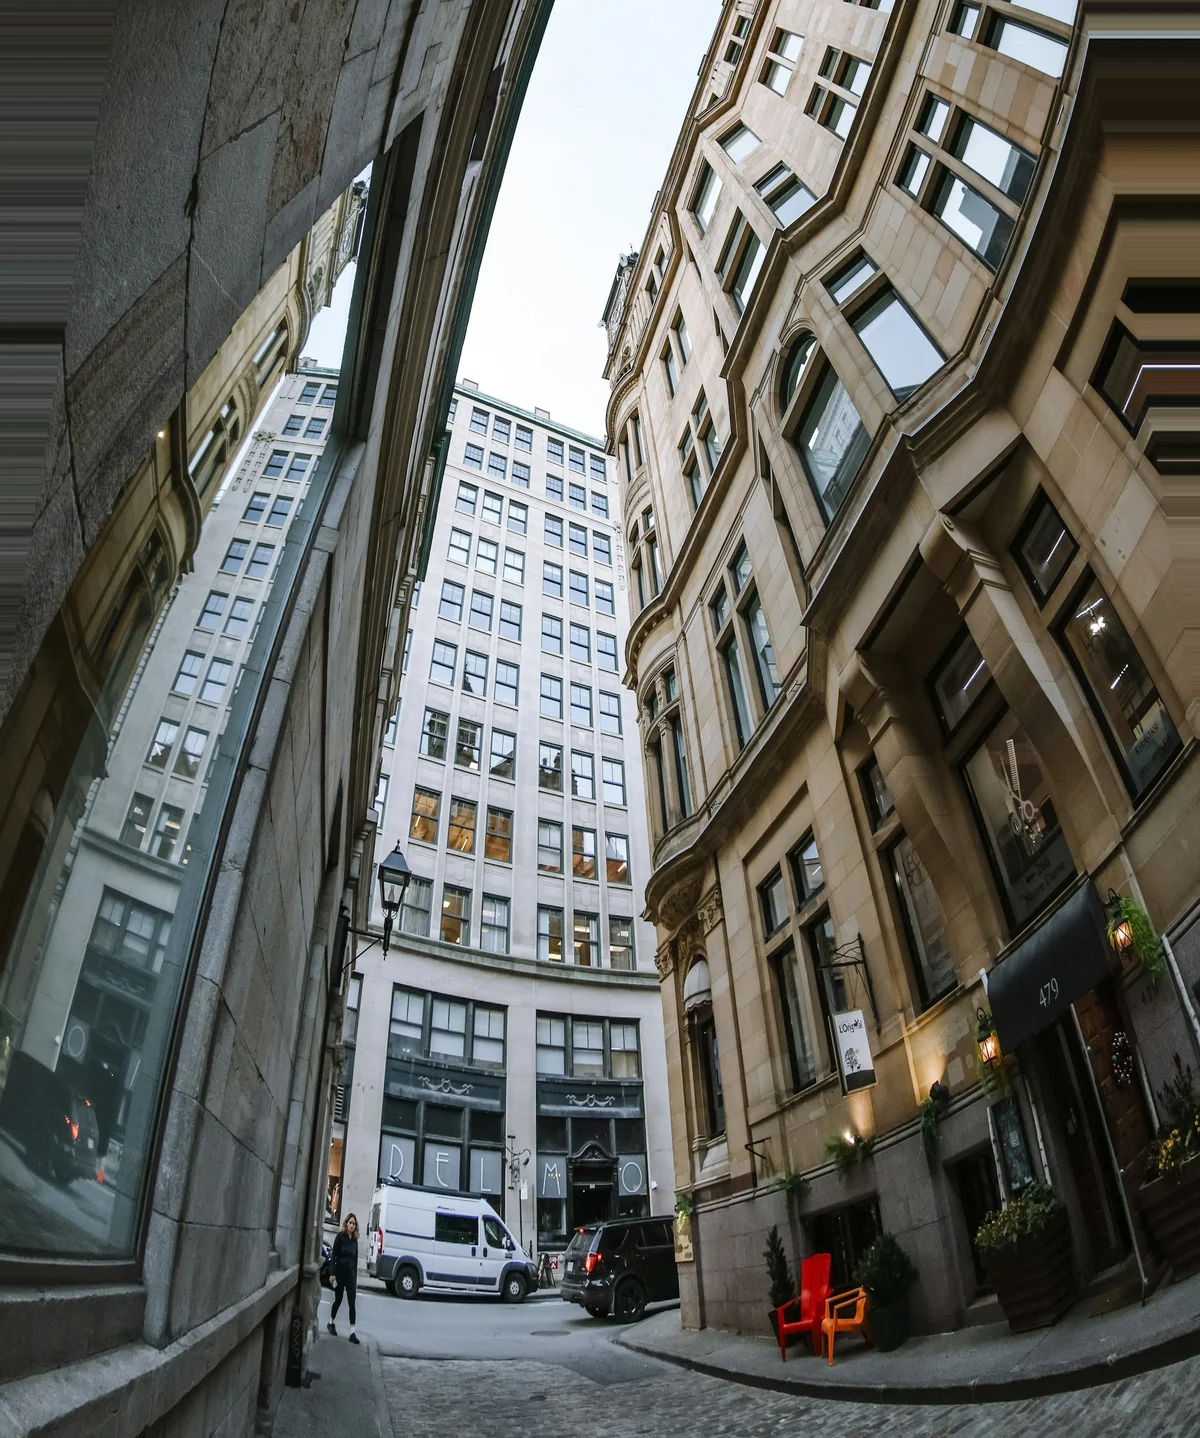
More examples like this: browse before & after results across every tool.
The listing photo looked fine through the viewfinder. On the screen, the apartment block is falling over backward — the walls that are dead plumb in real life lean toward each other like the building is being folded shut. Or it's an interior: the wide-angle room shot where the doorway bulges and the walls tilt inward, squeezing the space. Nothing is out of focus. Nothing is grainy. The geometry is just wrong, and no crop or rotate quite fixes it.
That's perspective distortion, and it has a specific cure. This tutorial covers the three different ways a straight line goes crooked (only one of which is fixed by rotating), why "just straighten it" fails on a leaning building, how to fix perspective distortion online in three steps, and where correcting geometry belongs in a real-estate or architecture workflow.
What Makes Buildings Lean and Lines Bend (Three Kinds of "Crooked")
Three separate problems all get called "crooked," and they have different causes and different fixes. Tilt is the whole frame rotated, so the horizon slopes. Convergence is parallel verticals leaning toward each other because you aimed the camera up or down. Curvature is straight lines bowing outward near the edges from wide-angle glass. Telling them apart is the whole game.
Tilt is the simple one: you didn't hold the camera level, and the entire image is rotated a few degrees. Convergence — the "leaning building" — happens the moment you tilt the lens off the subject's plane: point it up at a tower and the top of the frame is farther from the sensor than the bottom, so vertical lines that are truly parallel get compressed toward a vanishing point. Curvature, or barrel distortion, is pure optics: wide-angle lenses bend straight lines into gentle arcs, worst at the edges, whether or not you held the camera level.
| What you see | What it is | What causes it | The fix |
|---|---|---|---|
| **Whole photo tilted, horizon slopes** | Rotation / tilt | Camera not held level | Rotate & crop |
| **Verticals lean toward each other, building falls back** | Converging verticals (keystone) | Camera tilted up or down off the subject plane | Keystone correction |
| **Straight lines bow outward, worst near the edges** | Barrel distortion | Wide-angle lens optics | Radial (barrel) correction |
Most photos of buildings and rooms have two of these at once — a little barrel bend from the lens *and* converging verticals from the upward tilt. That's why a single "straighten" control never fully lands.
Why "Just Rotate It" Can't Straighten a Leaning Building
Rotation spins the whole frame around its center. It fixes a sloped horizon perfectly — and it does nothing for a leaning building, because the two walls aren't tilted the same way; they're *converging*. Spin the frame and one wall straightens while the other leans harder. Convergence is a projective distortion, and undoing it takes a projective warp that stretches the top of the frame wider than the bottom until the verticals run parallel again.
Barrel bend is a third, unrelated problem. It's a radial curve, so neither a rotate nor a keystone warp touches it — a bowed doorway stays bowed until you flatten the curvature itself. That's why proper correction runs in two passes: first flatten the lens curve, then un-converge the verticals.
You don't have to set any of that by hand. Auto-detect finds the lines that *should* be vertical or horizontal — wall edges, door frames, window mullions, floor seams — measures how far each one leans or bows, and computes the counter-warp. That two-stage geometric correction is what the perspective tool in EnhanceCraft's AI image toolkit runs, with manual sliders on top for the shots where you want the last word.
How to Fix Perspective Distortion Online (3 Steps)
Correcting perspective takes under a minute: upload the photo, let auto-detect straighten it or fine-tune by hand, and download the squared-up result. The free perspective correction tool processes two images a day with no account and nothing to install.
- 1.Upload your photo. JPG, PNG, or WebP — an exterior shot of a building, a wide-angle room, or any architectural frame where the lines should be true. Everything runs in the browser.
- 2.Let auto-detect straighten it, or fine-tune. Auto-detect works best when the frame has clear straight references — walls, doorways, floors. If it over-corrects, switch to the manual sliders and start low, around 0.2, nudging vertical and horizontal keystone until the verticals read plumb and the room stops bulging.
- 3.Download the corrected image. Save the squared-up frame and you're done — walls upright, lines true, ready for the listing or the portfolio.
In the full app, perspective correction costs 1 credit per image, and a free account includes 25 credits to start, then 10 every month with the watermark removed and no card required.
How to Keep a Corrected Photo Looking Natural
A well-corrected photo should look like you shot it dead-level with the right lens — not stretched to hit a ruler. The difference comes down to three habits.
- ●Don't force verticals to perfect plumb. Snap a tall building to mathematically parallel and it can tip the other way, looking like it's falling *toward* the viewer. A hair of residual lean often reads more natural than ruler-perfect.
- ●Mind the crop. Straightening warps the frame, so the edges get trimmed to keep a clean rectangle. Shoot with a margin of room around your subject and correction won't clip a roofline or a lamp; on a tight frame, a strong correction can cost you the corners.
- ●Watch the stretch. Heavy keystone correction stretches the top of the frame, so faces, furniture, or signage up there can look subtly widened. If it shows, ease the intensity down.
When we tuned auto-detect on our own test batches, the photos that looked most natural weren't the ones snapped to perfectly parallel. A trace of residual lean matched how the eye actually reads a tall building from street level — and the dead-perfect frames were the ones that occasionally tipped into looking like the building was pitching forward.
Where Perspective Correction Belongs in Your Workflow
Correct geometry early — before you crop, stage, or upscale — because every later edit inherits the shape of the frame. Fix a leaning wall after you've staged furniture into it and the furniture leans too.
- ●Before cropping and staging. Get the walls plumb first, then crop to your final composition on a frame that's already square. Virtual furniture and any composite you add will sit in true perspective instead of a skewed one.
- ●Real-estate interiors and exteriors. Wide-angle room shots bulge and ground-level building shots lean — both need correcting. Pair it with a dehaze pass on murky exteriors, sky replacement where the sky is blown out, and blown-out window recovery for bright glass. The free real-estate photo editor bundles straightening with the other standard listing fixes in a single pass.
- ●Before upscaling. An upscaler locks in whatever geometry you feed it, so straighten first — you want to enlarge the corrected frame, not bake the lean into a bigger file.
- ●Architecture portfolios. Ground-level shots of tall buildings always converge. Restoring true verticals is a lot of what separates a snapshot from an architectural photograph.
When Perspective Correction Won't Help
Correction straightens lines that exist in the frame — it can't invent references that aren't there, and it can't undo an extreme angle. Four cases where it isn't the answer:
- ●No straight references. A frame of trees, water, or organic shapes gives auto-detect nothing to lock onto. Switch to the manual sliders, or accept there's little to correct.
- ●Extreme upward angle. Shoot from almost directly below and the convergence is so severe that pulling it back stretches the top of the frame into mush. Re-shooting a step back beats correcting it.
- ●A fisheye you shot on purpose. If the curved, immersive look is the point, correcting it just flattens the effect you wanted.
- ●It's only tilted. If the sole problem is a sloped horizon, a plain rotate-and-crop is faster and cleaner than a full perspective warp.
From Leaning to Level
Straight lines are the quietest signal of a professional photo. A buyer scrolling a listing or a client flipping through a portfolio registers a leaning wall in a fraction of a second, even without being able to name what's off — and squaring it up is often the single edit that makes a shot look shot-on-purpose.
Try the free perspective correction tool — two images a day free with no sign-up, or create a free account for 25 credits to start, then 10 every month and watermark-free results, no card required. Straighten the worst-leaning frame in the set first; that's the one that will show you the difference.
Found this helpful?
Share it with your network
Ready to try it yourself?
25 free credits to start, then 10 every month. No credit card. Process your first image in under 15 seconds.
Try Perspective Correction freeMunib Ali Laghari
Founder & Lead Developer · EnhanceCraft
Munib Ali Laghari is the founder and lead developer of EnhanceCraft, an AI image toolkit. He writes about AI upscaling, photo restoration, and background removal. Connect on LinkedIn